Paddleboard Repair Kits Your Ticket to Smooth Sailing
Paddleboarding, with its serene waters and tranquil moments, can sometimes take an unexpected turn. Accidents happen, and minor damages to your paddleboard are almost inevitable. But don’t fret! In this beginner-friendly guide, we’ll explore the world of paddleboard repair kits and how they can be your lifeline when you encounter those unavoidable bumps along the way.
The Need for Paddleboard Repair Kits
Imagine gliding gracefully on your paddleboard when suddenly you hear a faint hissing sound. Uh-oh, you’ve got a small puncture! Or perhaps you accidentally bumped into a rocky shoreline, leaving a scratch or dent on your board. These situations are where paddleboard repair kits come to the rescue.
What’s Inside a Paddleboard Repair Kit?
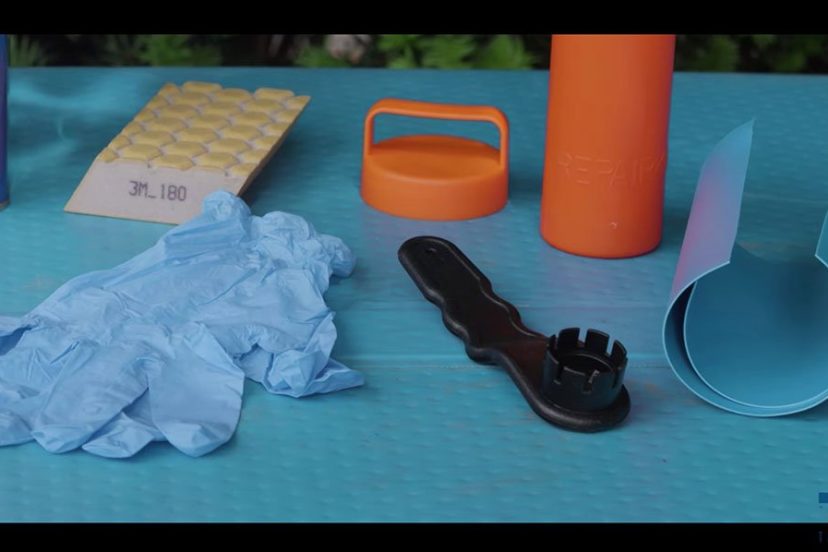
A typical paddleboard repair kit includes the following essential components:
- Adhesive: High-quality adhesive is the heart of any repair kit. It’s used to seal cracks, punctures, and dings on your paddleboard. Look for a UV-resistant adhesive to ensure it holds up under sunlight.
- Patch Material: Repair kits often include patches or fabric pieces that can be used in conjunction with the adhesive. These patches reinforce the repair and provide added strength.
- Applicator Tools: You’ll find tools like brushes or spatulas for spreading the adhesive evenly. These tools ensure a seamless repair job.
- Sandpaper: Sandpaper is essential for smoothing the surface before applying adhesive and patches. It helps create a clean and secure bond.
- Instructions: Most repair kits come with step-by-step instructions to guide you through the repair process, making it accessible even for beginners.

How to Use a Paddleboard Repair Kit
Repairing your paddleboard with a kit is easier than you might think. Here’s a simple step-by-step guide:
Preparation
- Begin by cleaning the damaged area thoroughly with freshwater to remove any debris, salt, or sand.
- Let it dry completely before proceeding.
- Sand the Area
- Use the included sandpaper to gently roughen the damaged area. This helps the adhesive bond effectively.
- Apply Adhesive
- Follow the kit’s instructions to apply the adhesive to the damaged area. Ensure you apply it evenly and cover the entire affected region.
- Attach Patch
- If your kit includes patches, place them over the adhesive while it’s still wet. Press down firmly to remove air bubbles and ensure a tight seal.
- Let It Cure
- Allow the adhesive to cure as per the instructions provided in your repair kit. This typically takes several hours or overnight.
- Sand and Finish
- Once the adhesive has fully cured, use the sandpaper to smooth the patched area. Your paddleboard should now be ready for action!
Why Every Paddleboarder Needs a Repair Kit
Paddleboard repair kits are a valuable addition to any paddleboarder’s gear for several reasons:
- Cost-Effective: Repairing minor damages with a kit is more budget-friendly than replacing your entire board.
- Quick Fixes: Kits enable you to address issues promptly, so you can get back on the water sooner.
- Extend Lifespan: Regular maintenance and repairs can prolong the life of your paddleboard, ensuring you enjoy it for years to come.
- Independence: Having a repair kit empowers you to tackle common issues without relying on professional repairs.
- Environmental Responsibility: Repairing damages reduces the need for new paddleboards, which is eco-friendly.
In conclusion, paddleboard repair kits are your go-to solution for tackling minor damages and ensuring your paddleboarding adventures remain smooth and enjoyable. By including a repair kit in your gear, you’ll be well-prepared for any bumps along the way, ensuring that your paddleboard remains in tip-top shape for countless journeys on the water. Also Read>>>>>>>
slot gacor


